Thursday, 31 January 2013

Tiddly Inks - Thursday throwback


Goedemorgen, vandaag is het mijn beurt om een post te maken voor Tiddly Thursday throwback van Tiddly Inks. Ik heb ervoor gekozen om een doosje met een klein bijpassend kaartje te maken. Het doosje is gevuld met lekker merci chocolaatjes, een perfect valentijns cadeautje dus. ;)

Goodmorning, today it is my turn to make something for Tiddly thursday throwback from Tiddly Inks. I decided to make a box and a matching little card. I filled the box with some delicious meci chocolats, a perfect valentines gift. . ;)


Het doosje, de Vertical heart box is uitgesneden met de silhouette. Ik heb hem uitgesneden uit pink lemonade cs van Elzybells. Ik heb met een witte gelpen stiklijntjes langs de rand van het grote hart getekend om dit nog eens extra te accentueren. De afbeelding die ik heb gebruikt, komt uit het buggs megapack van Tiddly Inks. Ik heb het meisje ingekleurd met mijn potloden en haar ogen zijn gekleurd met een zwarte glaze pen. Op het grote hart heb ik glitter aangebracht met een clear glitter pen van sakura. Ik heb de afbeelding uitgeknipt en daarna op het doosje geplakt. Uit wit papier heb ik een aantal witte kleine hartjes geponst en deze heb ik op het doosje geplakt. De tekst is gestempeld met de Essential sentiments stempelset van My favorite things. Ik heb hem in een bannervorm uitgeknipt en op het doosje geplakt. 

The box, the vertical heart box is cut out with the silhouette. I have cut it from pink lemonade cs from Elzybells. I have drawn faux stitching around the large heart to accentuate it. The image I used is from the Buggs megapack from Tiddly Inks. I have coloured the girl with my pencils and her eyes are coloured with a a black glaze pen. On the large heart I have applied glitter with a clear glitter pen from Sakura. I have cut the image out and then I adhered it on the box. The sentiment is stamped with the Essential sentiments stampset from My favorite things. I cut it into a bannershape and adhered it on the box. 


Het kaartje is gemaakt van hetzelfde pink lemonade cardstock. Ik heb op het kaartje dezelfde afbeelding uit het Buggs megapack van Tiddly Inks gebruikt. Weer ingekleurd met mijn potloden, de zwarte glaze pen en de clear glitter pen van Sakura. Ik heb de afbeelding op cirkels geplakt die zijn uitgesneden met de cirkel nestabilities. De witte cirkel is geëmbost met de hartjes embossingfolder uit de love language set. Langs de rand van de kaart heb ik stiklijntjes getekend met een witte gelpen. Op een heel smal strip roze papier heb ik ook een stiklijntje getekend met de witte gelpen. Deze strip heb ik op een strip zwart papier geplakt en daarna is het geheel op de kaart geplakt. Uit wit papier heb ik een bloemetjes geponst en daarop heb ik een roze knoopje geplakt. 

The card is made from the same pink lemonade cardstock from Elzybells. I used the same image from the Buggs megapack from Tiddly Inks. I coloured it again with my pencils, the black glaze pen and the clear glitter pen from Sakura. I have adhered the image on circles that were cut with the circle nestabilities. The white one is embossed with the hearts embossingfolder from the Love language set. I added faux stitching with a white gelpen. On a smal strip of pink paper I also have drawn faux stitching lines and then I adhered it on a strip of black paper and then everything was adhered on the card. I punched a tiny white flower and decorated it with a pink button.

*********************************************************************************
SILHOUETTE CUTTING FILE: Vertical heart box
PAPER: White and black cs,  Pink lemonade cs from Elzybells (retired)
INK: Versafine onyx black
ACCESSORIES: Pencils, black glaze pen, white gelpen, Love language set from Provocraft, circle nestabilities, flower punches 3 from Nellie Snellen, button, black thread, heart punch.

Wednesday, 30 January 2013

Christmas challenges with sketches


Goedemorgen, vandaag mag ik voor Stampfairy gast zijn bij het Christmas challenges with sketches blog, omdat hun challenge deze week wordt gesponsord door Stampfairy. Erg leuk om gast te zijn en bovendien erg handig omdat het al goed helpt met de voorraad kerstkaarten. ;)
Ik heb op mijn kaart de afbeelding Jake wintertime 1 van Stampfairy gebruikt.
De tekst komt uit de stempelset Signature christmas van Clearly besotted stamps

Goodmorning, today I am a guest for Stampfairy at the Christmas challenges with sketches blog, because their challenge is being sponsored by Stampfairy this week. Really nice to be a guest and also perfect for my stash of christmas cards! ;)
I used the image Jake wintertime 1 from Stampfairy on my card. 
The sentiment is from the set Signature christmas from Clearly besotted stamps.

*********************************************************************************
IMAGE: Jake wintertime 1 from Stampfairy, Signature christmas from Clearly besotted stamps.
PAPER: Red cs, Red devil paperpack from Bazzil basics
INK: Versafine onyx black
ACCESSORIES: Pencils, black glaze pen, glossy accents, white gelpen, white ribbon, circle nestabilities.

Tuesday, 29 January 2013

Tiddly Inks - I love you


Goedemorgen, vandaag laat ik jullie een valentijnskaartje zien dat ik heb gemaakt met de afbeelding Bloom beautifully van Tiddly Inks. Deze afbeelding is zowel als digitale stempel als als clear stempel verkrijgbaar. Ik heb de afbeelding rechtstreeks op de kaart gestempeld samen met een stipjeskader. Ik heb de afbeelding ingekleurd met mijn potloden en voor de ogen heb ik een zwarte glaze pen gebruikt. Met de silhouette heb ik de letters voor de tekst uitgesneden. Ik heb hiervoor rood stipjespapier genomen uit het North pole paperpad van Doodlebug gebruikt. Hetzelfde stipjespapier heb ik ook gebruikt om de strikken in Emma's haar en die op haar schoenen te paperpiecen.

Goodmorning, today I am showing you a valentine's card that I made with the image Bloom beautifully from Tiddly Inks. This image is available as a digital stamp or as a clear stamp. I printed the image on my card and I also added a dotted frame. I have coloured the image with my pencils and I used a black glaze pen for the eyes. I have cut the letters with the silhouette. I used red dotted paper from the North pole paperpad from Doodlebug for the letters I used the same dotted paper to paperpiece the bows in Emma's hair and the bows on her shoes. 

*********************************************************************************
IMAGE: Bloom beautifully from Tiddly Inks
PAPER: White cs, North pole paperpad from Doodlebug
ACCESSORIES: Pencils, black glaze pen, silhouette.

Monday, 28 January 2013

Kaartjes uit Hobbyjournaal 95

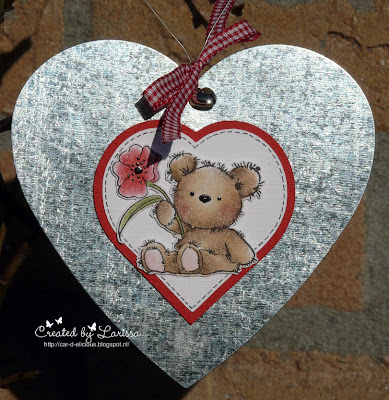
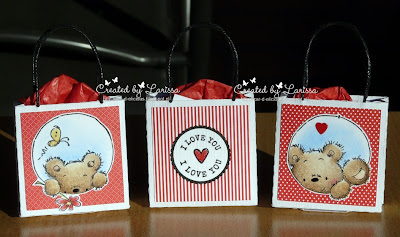
Deze maand mocht ik weer een aantal projectjes maken voor de Hobbyjournaal nummer 95. Omdat het bijna valentijsdag is, heb ik besloten om hier een hangertje, kaartje en wat kleine cadeautasjes voor te maken.

This month I was asked again to make some projects for the Dutch magazine Hobbyjournaal. Since it is almost Valentine's day, I decided to make a Valentine ornament, card and little bags.


De afbeelding die ik heb gebruikt is één van de beertjes van de Furry festive friends van Lili of the valley.


The image I used is one of the bears from the Furry festive friends set from Lili of the valley.


*********************************************************************************
IMAGE:  Festive furry friends from Lili of the valley.
PAPER: Red and white cs
INK: Versafine onyx black
ACCESSORIES: Pencils, black glaze pen, black fineliner, silhouette, red gingham ribbon, heart charm, metal heart from Xenos


De afbeelding is Blooming lovely van Lili of the valley. De tekst is van de Summer bears companion stamp set van Lili of the Valley.

The image is Blooming lovely from Lili f the Valley. The sentiment is from the Summer bears companions stamp set from Lili of the valley.

*********************************************************************************
IMAGE: Blooming lovely and Summer bears companion stamp set from Lili of the valley.
PAPER: White and black cs, Northpole paperpad from Doodlebug
INK: Versafine onyx black
ACCESSORIES: Pencils, black glaze pen, white ribbon, hotfix


Voor de tasjes heb ik afbeelding uit 3 verschillende sets van Lili if the Valley gebruikt. De beertjes komen uit de Posy trio en Present trio. De tekst komt uit de Greetings postmarks stempelset.


For the bags I used images from 3 different sets from Lili of the Valley. I used bears from the Posy trio and Present trio. The sentiment is from the Greetings postmarks stampset.


*********************************************************************************
IMAGE: Posy trio, present trio and Greetings postmarks from Lili of the Valley.
PAPER: White and black cs, Northpole paperpad from Doodlebug.
INK: Versafine onyx black
ACCESSORIES: Pencils, blak glaze pen, black cord, circel punch, silhouette, glossy accents, heart punch.

Saturday, 26 January 2013

Stampfairy - Guest at the Sketch saturday challenge


Goedemorgen, vandaag mag ik voor Stampfairy gast zijn bij het Sketch saturday challenge blog, omdat Stampfairy hun challenge sponsort deze week.
Ik heb ervoor gekozen om een valentijns kaartje te maken met een afbeelding uit de Toby love collectie van Stampfairy. Toby is ingekleurd met mijn potloden en zijn ogen en neus zijn eerst gekleurd met een zwarte glaze pen. Daarna heb ik glossy accents op de neus aangebracht. Ik heb de afbeelding uitgeknipt en met foamtape op het witte rechthoek geplakt. Op het witte rechthoek heb ik stiklijntjes getekend met een zwarte fineliner. Het zwart-witte hartjes papier komt uit de Pretty little hearts collectie van Pink petticoat. Op de kaart en de strip rood papier heb ik stiklijntjes getekend met een witte gelpen. De rode bloemetjes heb ik gemaakt met de retro flower punches. Ik heb de blaadjes omgekruld met een penseeltje. In het midden van de bloemen heb ik witte hotfix steentjes geplakt. De takjes zijn gemaakt met een ponsje. De tekst komt uit de stempelset Handwritten phrases van Lili of the valley.

Goodmorning, today I am a guest at the Sketch saturday challenge blog, because Stampfairy is sponsoring their challenge this week. 
I decided to make a valentines card with an image from the Toby love collection from Stampfairy. Toby is coloured with my pencils and his eyes and nose are coloured with a black glaze pen. I added glossy accents on his nose. I cut the image out and adhered it wth foamtape on the white rectangle. I have drawn faux stitching lines with a black pen on the white rectangle. The black and white heart paper is from the Pretty little hearts collection from Pink petticoat. On the card and strip of red paper I added faux stitching with a white gelpen. The red flowers are made with the retro flower punches, I curled the leaves with a pencils.I added white hotfix gems to the centres of the flowers. The branches are also made with a punch. The sentiment is from the Handwritten phrases stampset from Lili of the valley

*********************************************************************************
IMAGE: Toby love from Stampfairy, Handwritten phrases from Lili of the valley.
PAPER: Red, white and green cs, Pretty little hearts from Pink petticoat.
INK: Versafine onyx black
ACCESSORIES: Pencils, black glaze pen, glossy accents, black pen, white gelpen, retro flower punches, branch punch, hotfix.

Friday, 25 January 2013

Stampfairy - Barry diet


Goedemorgen, vandaag is er weer een release van een nieuwe Stampfairy collectie, namelijk de Barry diet collectie. Ik heb Barry ingekleurd met mijn potloden en zijn neus en ogen heb ik gekleurd met een zwarte glaze pen. Daarna heb ik op de neus glossy accents aangebracht. Ik heb Barry uitgeknipt en met foamtape op de kaart geplakt. Op de kaart heb ik een laag blauw papicolor karton geplakt. Dit papier heb ik geëmbost met een embossingsfolder van de Hobbyvoordeel zaak. De tekst heb ik geprint. Naast de tekst heb ik blauwe hotfixsteentjes geplakt.

Goodmorning, today we have a release from a new Stampfairy collection, the Barry diet collection. I have coloured Barry with my pencils and his eyes and nose are coloured with a black glaze pen. Then I applied glossy accents on his nose. I have cut Barry out and adhered with foamtape on the card. I have added a layer of blue cardstock on my card. It is embossed with an embossingfolder from a dutch store. The sentiment is printed. I added a couple of blue hotfix gems next to it.


*********************************************************************************
IMAGE: Barry diet 1 from Stampfairy
PAPER: White, blue and black cs.
ACCESSORIES: Pencils, black glaze pen, white gelpen, glossy accents, embossingfolder, blue hotfix.

Tuesday, 22 January 2013

Tiddly Inks challenge - Wings and new release!!

Goedemorgen, vandaag begint er weer een nieuwe challenge op het Tiddly Inks challenge blog. De challenge deze week is wings, je moest dus ergens vleugels op je kaartje gebruiken. Daarnaast is er ook nog een nieuwe release vandaag van Tiddly Inks. Vandaag worden de clear stempelsets For the birds en 3 stempelsetjes met de nieuwe karaktertjes Emma and Jake uitgebracht. Van Emma and Jake verschijnen Love fully, Bloom beautifully en Celebrate Joyfully.

Goodmorning, today a new challenge starts at the Tiddly Inks challenge blog. The challenge this time is Wings, so you have to use wings somewhere on your card. We also have a new release from some clear stamps today. Today the clear stamps For the birds and 3 set of the new characters Emma and Jake will be released. The Jake and Emma sets are Love fully, Bloom beutifully and Celebrate joyfully.


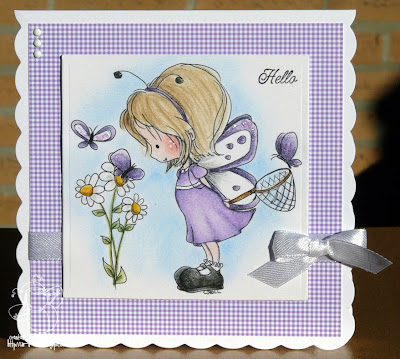
Het eerste kaartje van vandaag is gemaakt voor de Tiddly Inks wings challenge. Ik heb ervoor gekozen om de afbeelding Flutter by to say hi van Tiddly Inks te gebruiken. Je kunt de afbeelding zowel als digitale stempel, maar ook als clear stempel krijgen. Ik heb mijn afbeelding ingekleurd met mijn potloden. Annabelle's ogen zijn gekleurd met een zwarte glaze pen. Rondom de afbeelding heb ik gekleurd met blauw krijt. De tekst is gestempeld met een tekstje uit de stempelset Summer bears companion stamp set van Lili of the Valley. Ik he de afbeelding uitgesneden met de vierkante nestabilities. De kaart is een kant en klare scallop kaart die ik heb gekocht bij Pipoos. Hierop heb ik een laag paars ruitjes papier geplakt. Rondom het ruitjespapier heb ik eerst een wit lintje gebonden. Als laatste heb ik nog de kaart versierd met een aantal witte hotfix steentjes.

The first card of today was made for the Tiddly Inks wings challenge. I decided to use the image Flutter by to say hi from Tiddly Inks. The image is available as a digital stamp but also as a clear stamp. I have coloured the image with my pencils and Annabelle's eyes are coloured with a black glaze pen. I coloured around the image with blue chalk. The sentiment is stamped with the stampset Summer bears companion stamp set from Lili of the valley. I have cut the image out with the square nestabilities. I bought the scalloped card at a dutch craft store. I adhered a layer of purple gingham paper on top of it. I wrapped a white ribbon around the purple paper. I also added a couple of white hotfix gems to decorate the card.

I want to enter my card in the following challenges:
*********************************************************************************
IMAGE: Flutter by t say hi from Tiddly Inks, Summer bears companion stamp set from Lili of the Valley
PAPER: White card from Pipoos 
INK: Versafine onyx black
ACCESSORIES: Pencils, black glaze pen, blue chalk, square nestabilities, white ribbon, hotfix.


EDIT: De nieuwe stempels zijn niet op tijd aangeleverd bij Christy, dus de nieuwe release is met een dag uitgesteld. Ik zag dit helaas te laat, dus vandaar dat ze al wel op mijn blog staan.

Christy hasn't received the new stamps yet, so the new release will be postponed to wednesday. Unfortunately I  didn't see Christy's message on time, so they are already posted on my blog.

Dan volgen nu mijn kaartjes voor de nieuwe release. Het eerste kaartje is gemaakt met de afbeelding Love fully van Tiddly Inks. Ik heb de afbeelding ingekleurd met mijn potloden. De ogen van Emma en Jake zijn gekleurd met de zwarte glaze pen. Ik heb hiermee ook de knoopjes op het giletje van Jake gekleurd. Rondom de afbeelding heb ik gekleurd met blauw krijt. De stipjes op het jurkje van Emma zijn gemaakt met een witte gelpen. Ik heb de afbeelding uitgesneden met de vierkante nestabilities. Daarna heb ik er een zwart lintje omheen gebonden. De tekst is onderaan het vierkant geprint. Met een zwarte fineliner heb ik gedoodled langs de randen van het vierkant.Ik heb twee roze bloemtjes geponst met de retro flower punches. In het midden van de bloemen heb ik zwarte hotfix steentjes geplakt. Op een roze kaart heb ik zwart-wit gestipt papier geplakt en daarop heb ik de afbeelding met foamtape geplakt. 

Here is the first card from the new releases. This card is made with the image Love fully from Tiddly Inks. I have coloured the image with my pencils. The eyes of Jake and Emma are coloured with a black glaze pen, that I also used to colour Jake's buttons. I coloured with blue chalk aorund the image.The dots on Emma's dress are made with a white gelpen. I typed the sentiment. The image is cut out wit the square nestabilities. I added some doodling with a black pen. I wrapped a black ribbon around the square. The pink flowers are made with the retro flower punches. I added a black hotfix gem to the centres. I added a layer of black and white dotted paper on a pink card and then I adhered the image on top of it with foamtape.

I want to enter my card in the following challenges:

*********************************************************************************
IMAGE: Love fully from Tiddly Inks
PAPER: Pink cs
ACCESSORIES: Pencils, black glaze pen, white gelpen, square nestabilities, blue chalk, black pen, black ribbon, retro flower punches, hotfix


Het tweede kaartje van de nieuwe release is een clean and simple kaartje geworden. Voor deze kaart heb ik de afbeelding For the birds van Tiddly Inks gebruikt. Ik heb de tak met de vogels op mijn kaart geprint nadat ik eerst de letters voor de tekst Hello! had toegevoegd aan de afbeelding. Boven en onder de afbeelding heb ik een stippellijntje geprint. Verder heb ik nog de tekst op de kaart geprint. De vogels zijn ingekleurd met mijn potloden en de zwarte glaze pen. Daarna heb ik nog met blauw krijt rondom de afbeelding gekleurd,

The second card of the new releases is a clean and simple card. I have used the image For the birds from Tiddly Inks on this card. I printed the image on my card, after I had added the sentiment Hello! on it. Above and under the image I added a dotted line, I also added the sentiment at the bottom of the card. I coloured the image with my pencils and a black glaze pen. Then I coloured around the image with blue chalk.

I want to enter this card in the following challenges:


*********************************************************************************
IMAGE: For the birds from Tiddly Inks
PAPER: White cs
ACCESSORIES: Pencils, black glaze pen, blue chalk.


Het laatste projectje voor vandaag is een klein cadeau envelopje geworden waar een cadeaupasje in past. Ik heb de afbeelding direct op de envelop geprint. De tekst is er ook meteen op geprint. De afbeelding is ingekleurd met mijn potloden en voor de ogen heb ik een zwarte glaze pen gebruikt. De envelop is uitgesneden met de silhouette.

The last project from today is a little gift wallet for a gift card. I printed the image Celebrate joyfully from Tiddly Inks on the wallet. I also printed the sentiment on it. I coloured the image with my pencils and a black glaze pen. The wallet was cut out with the silhouette.


De achterkant van de envelop - The backside of the wallet

*********************************************************************************
IMAGE: Celebrate joyfully from Tiddly Inks
SILHOUETTE CUTTING FILE: 4 bar Size envelope
PAPER: White cs
ACCESSORIES: Pencils, black glaze pen, silhouette

Monday, 21 January 2013

Nog een keer Ahoy matey


Goedemorgen, vandaag laat ik nog een kaartje zien dat ik heb gemaakt met het stempelsetje Ahoy matey van Clearly besotted. Ik schreef laatst bij mijn eerste kaartje al dat ik een bepaald idee voor een kaartje in mijn hoofd had, maar dat de uitwerking nog niet precies wilde worden zoals ik in gedachten had. Afgelopen weekend heb ik het nog eens geprobeerd en nu lukte het wel. :)
Voor dit kaartje heb ik het schip gestempeld met Rocket red ink van Brilliance en Midnight blue van Memories. Ik heb het schip daarna uitgeknipt met een randje wit rondom de afbeelding. Ik wilde het schip op golven plaatsen en toen kwam mijn moeder op het briljante idee om met de letter c deze golven te maken. Ze zijn meerdere malen getypt en daarna na wat knip en plakwerk onstonden deze golven. Ik heb ze midden op de voorkant van mijn kaart geprint. Daarna heb ik met de silhouette dit frame uit blauw karton gesneden. Met een witte gelpen heb ik stiklijntjes langs de randen van het frame aangebracht. De tekst is weer gestempeld met de blauwe inkt en die heb ik op een rode banner geplakt. Als laatste heb ik 3 felrode hotfix steentjes opgeplakt.

Goodmorning, today I showing you another card that I made with the stampset Ahoy matey from Clearly besotted. A few days ago when I posted this card I already wrote that I had an idea for a card in my head, but it didn't work out like I wanted it to work out. This weekend I had another try and this time it worked out. :)
For this card I stamped the ship with Rocket red ink from Brilliance and Midnight blue ink from Memories. I have cut the ship out with a little white border. I wanted to add some waves on my card and then my mum got the brilliant idea to make waves with the letter c. They are typed a couple of times and then with some editing these waves were made. I printed them on the front of my card. Then I used the silhouette to cut this frame from blue cardstock. I added faux stitching with a white gelpen. The sentiment is stamped with the blue ink and then I adhered it on a red banner. Then I added 3 red hotfix gems.

I want to enter my card in the following challenges:

*********************************************************************************
IMAGE: Ahoy matey from Clearly besotted
PAPER: White, red and blue cs 
INK: Rocket red from Brilliance and idnight blue from Memories
ACCESSORIES: White gelpen, red hotfix gems, silhouette.

Saturday, 19 January 2013

Stampfairy - Mimi Valentine...finally


Hallo! Hier ben ik eindelijk met mijn kaartje voor de nieuwe Stampfairy release, helaas een dag te laat, maar er kwamen even wat dingen tussen, dus ik kon mijn kaartje pas vandaag afmaken. :)
Deze week heeft Gerda weer een geweldig leuke collectie stempels getekend, namelijk Mimi Valentine. Zijn alle afbeeldingen niet leuk? Ik heb Mimi ingekleurd met mijn potloden en haar ogen heb ik gekleurd met een zwarte glaze pen. Ik heb de afbeelding uitgeknipt en daarna met foamtape op de kaart geplakt. Als basis heb ik een rode kaart genomen en daarop heb ik dit schattige hartjes papier uit het Home for christmas paperpack van Papermania gebruikt. Het komt dus uit een kerstcollectie maar is dus ook perfect voor valentijnsdag. De cirkel waarop ik Mimi heb geplaatst is uitgesneden met de cirkel nestabilities en daarna heb ik de witte cirkel geëmbost met de swiss dots embossingfolder. Uit het rode papier heb ik twee bloemetjes geponst met de floral punches 3 van Nellie Snellen.  De takjes zijn de leafy branch die van CC. Designs. De tekst komt uit de stempelset Essential sentiments van My favorite things

Hello! Here I am finally with my Stampfairy new release card for this week. I am a day late unfortunately, but  because of some stuff that happened, I was only able to finish my card today. :)
This week Gerda has drawn the amazing collection Mimi Valentine. Don't you love all those cute images?I have coloured Mimi with my pencils and her eyes are coloured with a black glaze pen. I have cut the image out and then I adhered it on the card with foamtape. I used red cardstock for my card and I added this cute heart paper from the Home for christmas paperpack from Papermania. It is actually christmas paper, but also very perfect for Valentines day. The circle are cut with my nesties and I embossed the white one with the swiss dots embossing folder. I have punched 2 flowers from the red paper with the floral punches 3 from Nellie Snellen. The branches are made with the leafy branch die from CC designs. The sentiment is from the set Essential sentiments from My favorite things


I want to enter my card in the following challenges:

*********************************************************************************
IMAGE: Mimi valentine from Stampfairy, Essential sentiments from My favorite things

PAPER: Home for christmas from Papermania, red and white cs.

INK: Versafine onyx black
ACCESSORIES: Pencils, black glaze pen, glossy accents, leafy branch die from CC designs, Floral punches 3 from Nellie Snellen, holepunch, circle nestabilities. swiss dots embossingfolder.

Wednesday, 16 January 2013

Tiddly Inks - On cloud 9


Hallo! Vandaag heb ik een Tiddly Inks kaartje om te laten zien. De afbeelding die ik heb gebruikt is Cloud 9 van Tiddly Inks, verkrijgbaar als digitale stempel, maar ook als clear stempel! Ik heb de afbeelding samen met de tekst direct op mijn kaart geprint en deze daarna ingekleurd met mijn potloden. Ik heb Wryn's ogen ingekleurd met een zwarte glaze pen. Rondom de afbeelding heb ik gekleurd met blauw krijt. Het design papier dat ik heb gebruikt komt uit een paperpad van My mind's eye Fine and dandy: tickled pink. Ik heb met de silhouette er een vierkant uitgesneden voor de afbeelding en ook heb ik de sneetjes voor het lint uitgesneden. Onderaan heb ik een wit lintje door de kaart geregen en rechts bovenin heb ik een smal lintje rondom gebonden. Met een witte gelpen heb ik stiklijntjes rondom de kaart gemaakt. Het frame van design papier heb ik daarna met foamtape op de kaart geplakt. Het bloemetje is gemaakt met de floral punches 1 van Nellie Snellen. Het knoopje komt uit een zakje van de Hobbyvoordeel. 


Hello! Today I am posting a Tiddly Inks card. The image I used is Cloud 9  from Tiddly Inks, which is available as a digital stamp or as a clear stamp. I printed the image together with the sentiment on my card and then I coloured everything with my pencils. Wryn's eyes are coloured with a black glaze pen and I used blue chalk to colour around the image. The design paper I used is from a paperpad from My mind's eye: Fine and dandy tickled pink. I cut a frame from the paper with the silhouette and I also cut the holes for the ribbon. I threaded a white ribbon through it and in the right upper corner I added a little bow. Then I added faux stitching with a white gelpen. I adhered the frame with foamtape on the card. The flower was made with the floral punches 1 from Nellie Snellen. I added a pink button to the centre of the flower.

I want to enter this card in the following challenges:
*********************************************************************************
IMAGE: Cloud 9 from Tiddly Inks
PAPER: White cs, Fine and dany Tickled pink from My mind's eye
ACCESSORIES: Pencils, black glaze pen, blue chalk, white gelpen, silhouette, white ribbon, floral punches 1 from Nellie Snellen, pink button.


Tuesday, 15 January 2013

Tuesday morning sketches - Molly in love


Goedemorgen, vandaag mag ik voor Stampfairy gast zijn bij het Tuesday morning sketches blog, omdat Gerda van Stampfairy hun challenge deze week sponsort. Heel leuk, omdat mijn lieve vriendin Angela in het design team van Tuesday morning sketches zit! :) De challenge deze week is een sketch en je moet ook nog 2 lintjes gebruiken op je kaart. 

Ik heb ervoor gekozen om een valentijskaartje te maken. Ik heb hiervoor de afbeelding Molly in love van Stampfairy gebruikt. Molly is ingekleurd met mijn potloden en voor haar ogen heb ik een zwarte glaze pen gebruikt. Op haar ballon heb ik stickles aangebracht en daarna heb ik de afbeelding uitgeknipt. Voor de kaart heb ik strawberry fool karton van Elzybells gebruikt. Hierop heb ik een laag zwart-wit gestipt papier geplakt, nadat ik er eerst een wit lintje omheen gebonden heb. De hexagons heb ik uitgesneden met de silhouette. Ik heb met een witte gelpen stiklijntjes getekend op de hexagons. Op één van de hexagons heb ik een aantal zwarte pareltjes geplakt. Op een andere hexagon heb ik een klein strikje van zwart lint geplakt. De tekst is gemaakt met sticker letters en een hartje dat ik heb geponst.

Good morning, today I am a guest at the Tuesday morning sketches blog, because Gerda from Stampfairy is sponsoring their challenge this week. Really fun, because my sweet friend Angela is a member of the Tuesday monring team! :) The challenge this week is a sketch and you also have to use 2 ribbons on your card.

I have decided to make a valentine's card. I used the image Molly in love from Stampfairy on it. Molly is coloured with my pencils and I used a black glaze pen on her eyes. I added stickles on her balloon and then I cut the image out. For my card I used strawberry fool cardstock from Elzybells. I added a layer of black and white dotted paper on top of it after I wrapped a white ribbon around it. The hexagons are cut with the silhouette. I have drawn faux stitching lines on the hexagons with a white gelpen. On one of the hexagons I adhered a couple of black pearls and on another one I added a little bow that I made from black ribbon. The sentiment is made with sticker letters and a little punched heart.

I want to enter my card in the following challenges:
*********************************************************************************
IMAGE: Mimi in love from Stampfairy
PAPER: Strawberry fool from Elzybells (retired)
ACCESSORIES: Pencils, black glaze pen, stickles, white gelpen, silhouette, black and white ribbon, black pearls, stickler letters, heart punch.


Sunday, 13 January 2013

Clearly Besotted - Ahoy matey


Hallo! Vandaag laat ik een kaartje zien dat ik heb gemaakt met het stempelsetje Ahoy matey van Clearly besotted stamps. Toen ik aan het kaartje begon had ik een hele andere layout voor mijn kaartje in mijn hoofd, maar op de een of andere manier wilde dat maar niet leuk worden. :) Uiteindelijk is het dit kaartje geworden. 
Ik heb de stempel afgedrukt met bruine inkt. De kleur past erg goed bij het chocolate brownie karton van Elzybells (retired). Ik heb de afbeelding uitgesneden met de long deckled rectangles nestabilities. Onderaan heb ik de tekst gestempeld. Het ankertje heb ik met versamark inkt gestempeld en daarna geëmbost met witte embossingpoeder. Daarna heb ik het uitgeponst met een cirkelpons en toen heb ik de cirkel gekleurd met de bruine inkt. Ik heb bruin keukentouw (van Dille en kamille) rondom het rechthoek gebonden en daar bovenop heb ik het cirkeltje met de inkt geplakt.

Hello! Today I am showing you a card that I made with the stampset Ahoy matey from Clearly besotted stamps. When I started making this card, I had a different layout in my head, but that didn't work out like I wanted it to. :) So I ended up with this card. 
I stamped the image with brown ink. The colour really matched the chocolate brownie cardstock from Elzybells (retired). I have cut the image out with the long deckled rectangle nestabilities. I stamped the sentiment on the bottom of the rectangle. I stamped the anchor with versamark ink and then it was embossed with white embossignpowder. I punched it out with a circle punch and then I inked the circle with the brown ink. I wrapped brown bakers twine around the rectangle and adhered the circle on top of the knot.

*********************************************************************************
IMAGE: Ahoy matey from Clearly besotted
PAPER: Chocolate brownie from Elzybells (retired) and white cs
INK: Brown ink (no brand), versamark
ACCESSORIES: Circle punch, brown bakers twine from Dille en kamille (A dutch store), white embossingpowder, long deckled rectangles nestabilities.

Friday, 11 January 2013

Stampfairy - Herb ribbons


Goedemorgen, vandaag is er weer een nieuwe release van Stampfairy en deze week heeft Gerda de collectie  Herb ribbons getekend. Ik heb Herb ingekleurd met mijn potloden en voor zijn ogen en neus heb ik eerst een zwarte glaze pen gebruikt en daarna heb ik op de neus glossy accents aangebracht. Op het lintje en Herb's vleugels heb ik stickles aangebracht. Ik heb daarna de afbeelding uitgeknipt. Ik heb besloten om een tag te maken met de afbeelding. Ik heb de tag uit fuchsia papier Co'ordinations papier gesneden. De onderkant van de tag heb ik geëmbost met de swiss dots embossingfolder en daarna heb ik de stippen bewerkt met mijn nagelvijl. Boven de stippen heb ik een wit stickerrandje geplakt. Langs de bovenkant van de tag heb ik stiklijntjes getekend met een witte gelpen en daarna heb ik witte stickersterren opgeplakt. Ik heb een wit lintje bevestigd aan de tag en dat heb vastgebonden met fuchsia baker's twine.

Goodmorning, today we have a new release from Stampfairy and this week Gerda has drawn the Herb ribbons collection. I have coloured Herb with my ribbons and I used a black glaze pen on his eyes and nose. I also added glossy accents on his nose. I have added stickles on Herbs wings and ribbon and then I cut the image out. I decided to make a tag. I have cut it from fuchsia coórdinations paper. I embossed the bottom of the tag with the swiss dots embossingfolder and then I sanded the dots. I attached a little peel off border. With a white gelpen I added faux stitxhing. I decorated the tag with a couple of white peel off stars. I attached a white ribbon and used fuchsia bakers twine to hold it together.


*********************************************************************************
IMAGE: Herb ribbons from Stampfairy
PAPER: Fuchsia co'ordinations
ACCESSORIES: pencils, black glaze pen, glossy accents, stickles, swiss dots embossing folder, peel off border and stars, white ribbon, bakers twine. 

Thursday, 10 January 2013

Teddy Bo beterschapskaartje


Goedemorgen, dit wordt even een snel berichtje. Ik heb een beterschapskaartje gemaakt met een afbeelding van Teddy Bo. Dit is Nightnurse en ze is ingekleurd met potloden, een zwarte glaze pen en blauw krijt. De schets die ik heb gebruikt is van het Addicted to stamps challenge blog.

Goodmorning, this is a real quick post from me. I made a get well card with an image from Teddy Bo. This is Nightnurse and  she is coloured with my pencils, a black glaze pen and blue chalk. The sketch I followed is from the Addicted to stamps challenge blog.

*********************************************************************************
IMAGE: Nightnurse from Fairy doodler
PAPER: Red and white cs
ACCESSORIES: Pencils, black glaze pen, white gelpen, blue chalk, white ribbon.

Wednesday, 9 January 2013

ABC christmas challenge blog - A is for animal


Vandaag ben ik guestdesigner bij het ABC christmas challenge blog, omdat hun challenge deze keer gesponsord wordt door Stampfairy. De challenge is A is for animal, je moet dus een dier op je kaartje gebruiken en dan moet het natuurlijk ook nog een kerstkaartje zijn. Dus hier is mijn eerste kerstkaart van 2013. Toch wel handig dit soort challenges, misschien lukt het me dan om wel op tijd klaar te zijn met kerstkaartjes maken. ;)
De afbeelding die ik heb gebruikt komt uit de Patches christmas 1 collectie van Stampfairy. Ik heb de beer ingekleurd met mijn potloden. De ogen en neus zijn gekleurd met een zwarte glaze pen. Rondom de afbeelding heb ik gekleurd met blauw krijt. Het cadeautje heb ik gepaperpieced met design papier van Pipoos. Daarna heb een echt wit lintje gebruikt als strik rondom het cadeautje. Het kaartje heb ik verder heel simpel gehouden. Ik heb een vlaggenvorm gesneden uit het sterretjes papier en deze heb ik op de kaart geplakt, nadat ik daar eerst de tekst op had geprint. De afbeelding heb ik er daarna met foamtape overheen geplakt.

Today I am a guestdesigner at the ABC christmas challenge blog, because their challenge is being sponsored by Stampfairy this time. The challenge this time is A is for animals, so all you have to do, is add a animal somewhere on your card and it also has to be a christmas card. So this is my first christmas card of 2013. I really should join these sort challenges more often this year, so maybe I will be finished earlier with my christmas cards this year. ;)
The image I used is from the Patches christmas 1 collection from Stampfairy. I have coloured the bear with my pencils. The eyes and nose are coloured with a black glaze pen. I coloured around the image with blue chalk. I paperpieced the present with star design paper from Pipoos (a dutch store). I also used a real white ribbon on the image. I kept the card very simple. From the starry paper I cut a large banner and adhered it on the card after I had printed the sentiment (Happy holidays) on it. I adhered the image with foamtape on the card.

*********************************************************************************
IMAGE: Patches christmas 1 from Stampfairy
PAPER: White and black cs, star design paper from Pipoos
ACCESSORIES: Pencils, blue chalk, stickles, black glaze pen, white gelpen, white ribbon.

Tuesday, 8 January 2013

Tiddly inks challenge - Anything goes en Flying high


Goedemorgen, vandaag beginnen de challenges weer van Tiddly Inks en deze keer is de challenge niet zo moeilijk, namelijk Anything goes, ofwel alles mag. Geen probleem dus.
Ik heb ervoor gekozen om een lekker zonnig kaartje te maken, want het weer in Nederland is niet echt fantastisch op het moment. Ik wil graag een zonnetje zien in plaats van a die grijze wolken. ;)
Op mijn kaartje heb ik de afbeelding Happy bee day van Tiddly Inks gebruikt, deze kun je krijgen als digitale stempel, maar ook als clear stempel. Ik heb de afbeelding ingekleurd met mijn potloden. Annebelle's ogen zijn gekleurd met een zwarte glaze pen. Rondom de afbeelding heb ik gekleurd met blauw krijt. Ik heb langs de randen van de rechthoek heb ik zwarte lijntjes gedoodled. Op de kaart heb ik eerst een laag zwart papier geplakt en daarop geel designpapier uit het Countrydrive paperpad van Echo park geplakt. In het design papier heb ik gaatjes gemaakt en hierdoor heb ik een zwart lintje gebonden. Op de afbeelding zelf heb ik nog heel veel glitter aangebracht met de clear glitter pen van Sakura, maar dat is niet zo goed te zien op de foto.

Goodmorning, today a new challenge from Tiddly Inks has started and this time our challenge isn't very hard. The challenge is Anything goes. Very easy!
I decided to make a sunny and bright card, because the weather in the Netherlands at the moment isn't that good. I want a sun instead of all the grey clouds. ;)
I have used the image Happy bee day from Tiddly Inks on my card. You can get is as a digital stamp but also as a clear stamp. I have coloured the image with my pencils. Annebelle's eyes are coloured with a black glaze pen. I have coloured around the image with blue chalk. I doodled on the edges of the rectangle with a black pen. On the card I first adhered a layer of black paper. On top of that I added yellow design paper from the Country drive paperpad from Echo Park. I made a few holes in the design paper and threaded it with a black ribbon. I have added lots of glitter to the image itself with a clear glitter pen from Sakura, but you can't see it very well on my picture.

I want to enter this card in the following challenges:


*********************************************************************************
IMAGE: Happy bee day from Tiddly Inks
PAPER: White and black cs, Country drive paperpad from Echo Park
ACCESSORIES: Pencils, black glaze pen, black pen, black ribbon, hole punch, clear sakura glitter pen. 

Vandaag is er ook weer een nieuwe release van Tiddly Inks. De set Flying high wordt gereleased als digitale stempel maar ook als clear stempel en Skater Wryn en Snowbuddy wryn worden uitgebracht als clearstempels.

Today is also a new release from Tiddly Inks. The set Flyingh high will be released as a digital stamp and also as a clear stamp and Skater Wryn and Snowbuddy Wryn will be released as clear stamps.


Dit kaartje is gemaakt met één van de hondje uit de set Flying high van Tiddly Inks. Ik heb de afbeelding ingekleurd met mijn potloden. De neus en ogen van de hond zijn gekleurd met een zwarte glaze pen en daarna heb ik glossy accents aangebracht. Ik heb de afbeelding uitgeknipt. De touwtjes heb ik niet uitgeknipt maar vervangen door echte touwtjes. De wolkenachtergrond is van Silly scape van Hero arts. De tekst hoort bij de set Flying high van Tiddly Inks en deze heb ik rechtstreeks op de kaart geprint.

This card was made with one of the doggies from the set Flying high from Tiddly Inks. I have coloured the image with my pencils. I coloured the eyes and nose with a black glaze pen and then I aplied glossy accents on the nose. I have cut the image out and cut all the ropes away and replaces those with some real black cord. The cloudy background is from the Silly scape set from Hero arts. The sentiment is from the Flying high set from Tiddly Inks and I printed it on the card. 

*********************************************************************************
IMAGE: Flying high from Tiddly inks, Silly scape from Hero arts.
PAPER: White cs
ACCESSORIES: Pencils, black glaze pen, glossy accents, black cord


In de set Flying high van Tiddly Inks zitten 2 afbeeldingen van vliegende hondjes, dus ik moest met het andere hondje ook een kaartje maken, want anders ging die mij vast heel zielig zitten aankijken. ;) De afbeelding is weer ingekleurd met mijn potloden. De ogen en neus zijn weer ingekleurd met de zwarte glaze pen en op de neus heb ik glossy accents aangebracht. Ik heb de afbeelding uitgeknipt en de touwtjes vervangen door echt touwtjes. Deze keer heb ik met de cirkel nestabilities een rondje uit de wolkenachtergrond van Silly scape van Hero arts gesneden. De tekst komt uit de Flying high set van Tiddly Inks en deze heb ik ook hier rechtstreeks op de kaart geprint.

In the set Flying high from Tiddly Inks you can find another cute image froma doggie, so I had to make another card with him. I know that if I hadn't done that it would have looked at me with a really sad face. ;) The image was coloured again with my pencils. I used a black glaze pen for the eyes and nose and on the nose I aplied glossy accents. I have cut the image out and replaced the ropes with some real cord. This time I used the circle nestabilities to cut a circle from the Silly scape background from Hero arts. The sentiment is from the Flying high set from Tiddly Inks and I printed it on the card.

*********************************************************************************
IMAGE: Flying high from Tiddly inks, Silly scape from Hero arts.
PAPER: White cs
ACCESSORIES: Pencils, black glaze pen, glossy accents, black cord, circle nestabilities


Het laatste kaartje van vandaag is gemaakt met de laatste van de 3 afbeeldingen uit de set Flying high van Tiddly Inks. Ik heb de afbeelding ingekleurd met mijn potloden en voor de ogen heb ik een zwarte glaze pen gebruikt. Op de ballonnen heb ik stickles aangebracht. Langs de randen heb ik stiklijntjes gedoodled met een zwarte fineliner. Op een witte kaart heb ik design papier uit het Country drive paperpad van Echo Park geplakt. De ronden zijn afgerond met de corner chomper. De tekst is gestempeld met een stempel van de Greetings postmarks stempelset van Lili of the valley. Ik heb middenop een klein rood hartje toegevoegd waarop ik Glossy accents heb aangebracht. De tekst is geponst en daarna heg ik een stiklijntje getekend met een roze gelpen. Rondom het design papier heb ik nog een wit lintje gebonden. 

The last card of today I made with one of the 3 images from the set Flying high from Tiddly Inks. I have coloured the image with my pencils and I used a black glaze pen for the eyes. I added lots of stickles on the balloons. I doodled stiched lines next to the image. On a white card I adhered design paper from the Country drive paperpad from Echo Park. I rounded the corners with the corner chomper. The sentiment is stamped with a stamp from the Greetings postmarks stempelset van Lili of the valley. I added a little red heart and used glossy accents on it. I punched it out with a circle punch and added faux stitching with a pink pen. I wrapped a white ribbon around the design paper.

*********************************************************************************
IMAGE: Flying high from Tiddly Inks, Greetings postmarks from Lili of the Valley.

PAPER: White cs, Country drive paperpad from Echo Park
INK: Versafine onyx black
ACCESSORIES: Pencils, black glaze pen, stickles, black and pink fineliner, corner chomper, circle punch, heart punch, glossy accents, white ribbon.

LinkWithin

Related Posts with Thumbnails